
Creating my first game
Creating my first game
Where do I start?
Creating a whole game is not an easy task. There are a lot of little details that need to be considered in order to make the game work as good as possible.
When creating your own game, always set the goals at the beginning, so you can work from the bottom up with some structure in mind. Writing code without a bigger picture in mind can be a big problem later on in the code development.
The game that we're going to create is one that is going to showcase pretty much every feature we've gone through so far.
It will look like a simple video game, kind of like Snake, where you'll be able to move a circle and change its properties.
The game will have a lot of different functions that are going to be called from the void loop.
This way, the code will be nice and clean and you can call the same function multiple times without re-typing or copying the code.
Let's begin!
Movement
There are several ways to create a movement for our main character, which will be a simple circle in this game.
One of the simplest and the most effective ones if by having little flags. Each of the directions has a flag that determines whether the character should be moving in that direction or not.
The flag is set to 1 when the button is pressed and then back to 0 when the button has been released. Pretty simple.
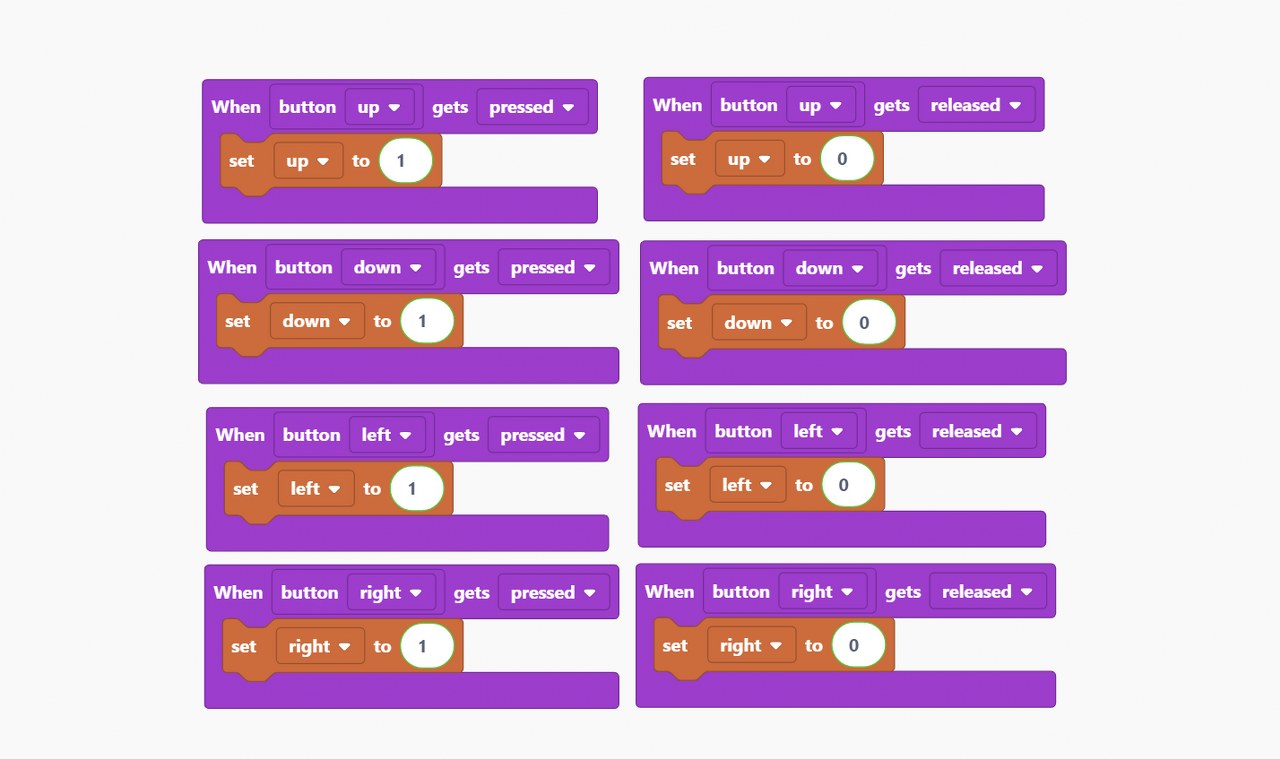
This will enable continuous movement without pressing a button multiple times, but rather just hold it.
You can also make your character move a bit whenever you press a button so that you have to press it multiple times in a row to get a continuous movement.
That doesn't move the character at all. What helps to move is the following function.
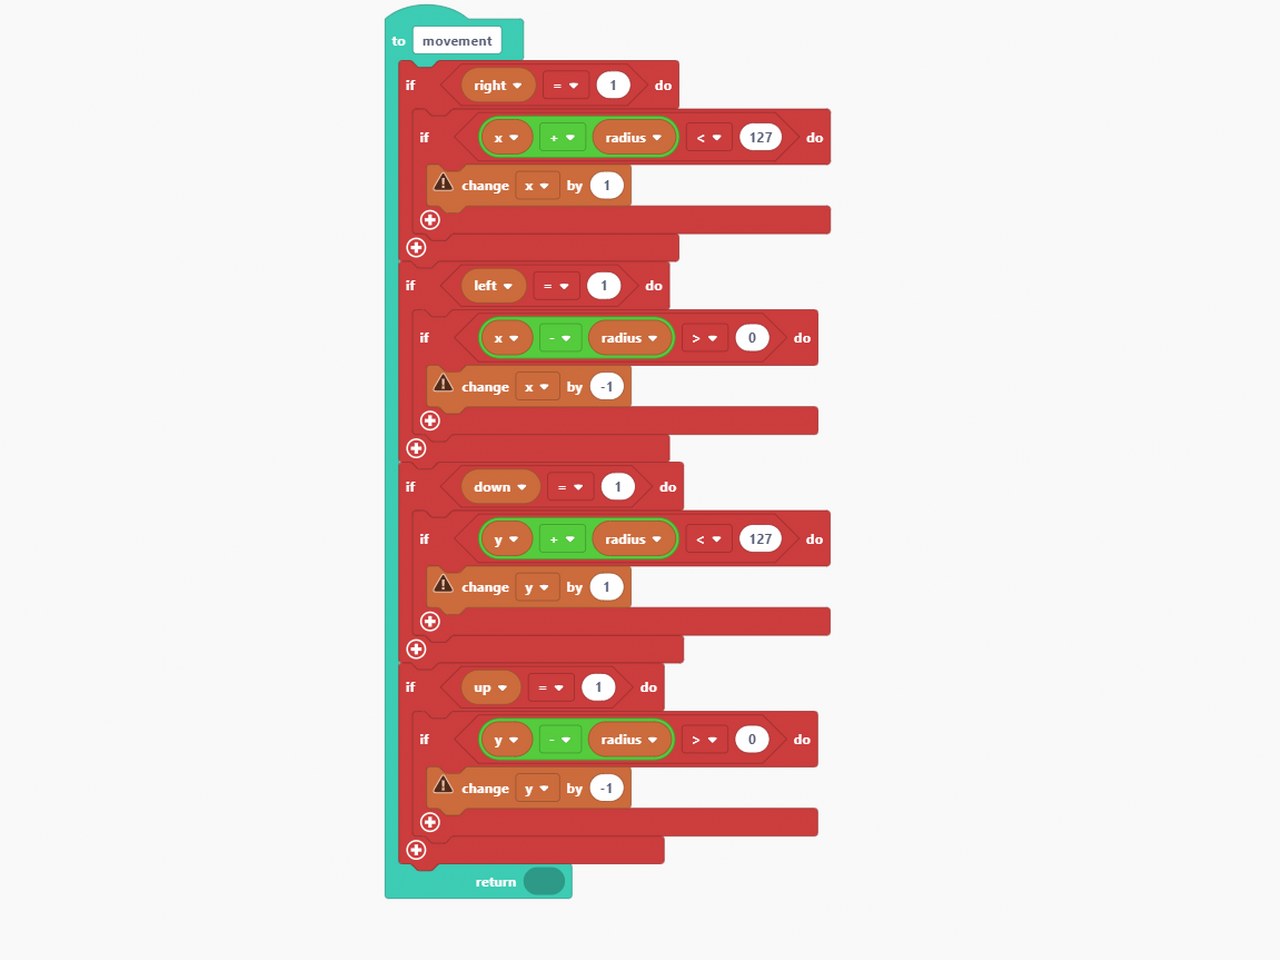
We've given our character simple coordinates - x and y.
Also, since the character is a circle, he gets a size - a radius.
In this function, we're checking several things. Firstly, we check whether the movement flag for the direction is active or not.
Then, we check whether the character has come to the edge of the screen or not. If not for this check, the character would easily just go off the screen.
Lastly, we move the character by 1 pixel each loop, which is pretty fast, so our character will cover the whole screen in about two seconds.
This direction check is located in the main loop, and it is done every time.
Main loop
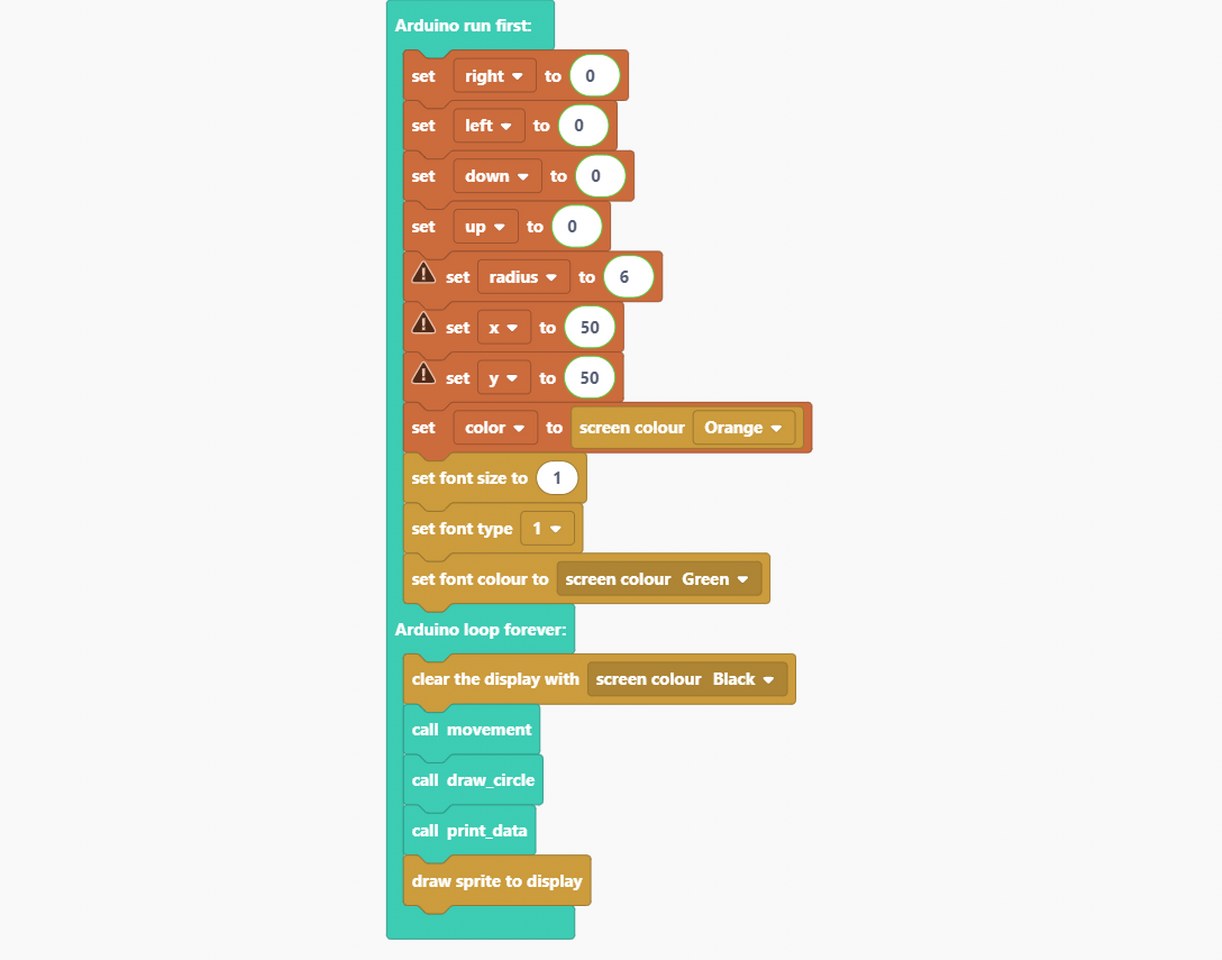
Our main part of the program looks like this.
In the setup part of the program that runs only once, we set the look of the text and default values for the character variables.
Then in the loop part that is called all the time, we're checking the direction in which the character is going and actually drawing the character.
Drawing the character
We first have to choose its size and color to draw the character.
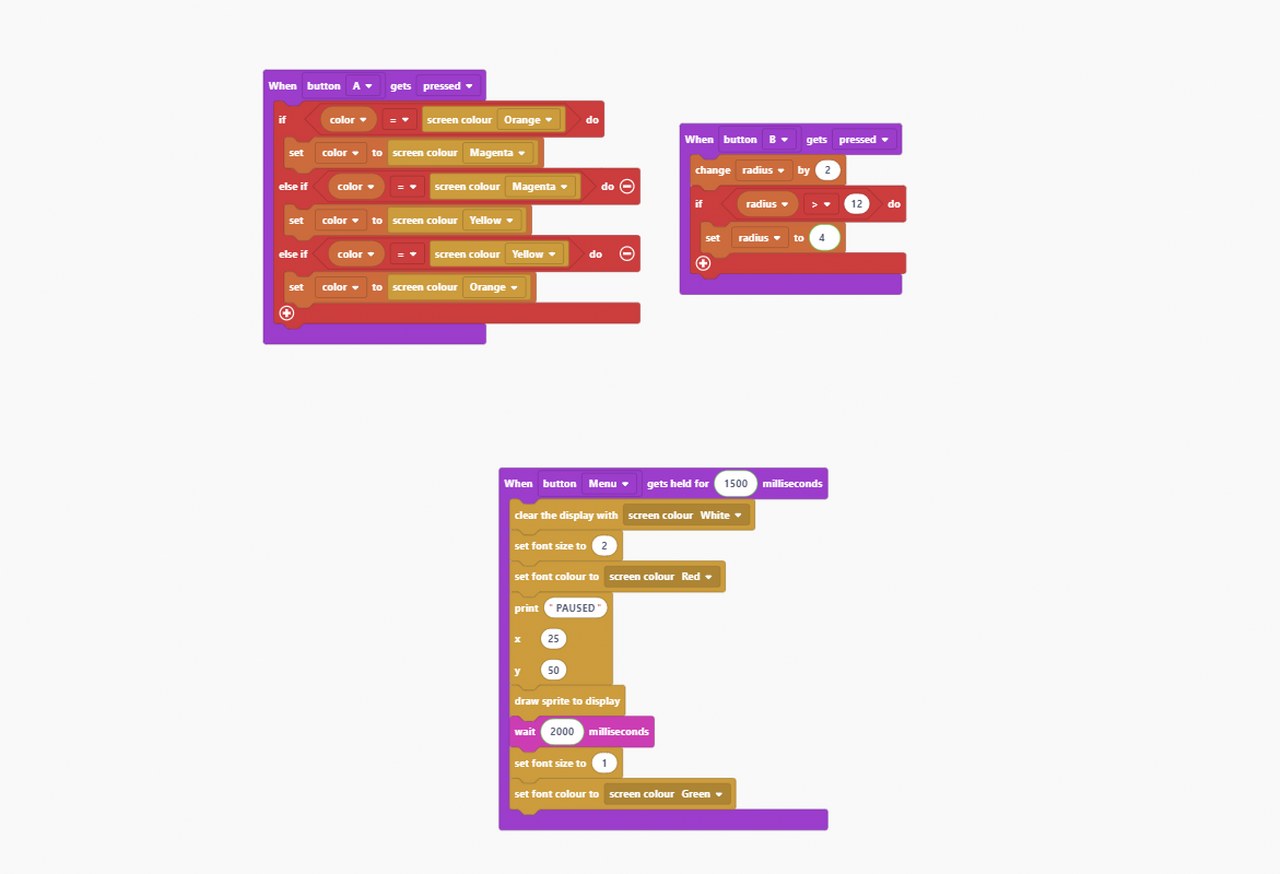
This is done by either pressing or releasing one of the two main buttons - A and B. This method has already been shown in previous chapters, and it's quite simple.
We only need to assign what action happens each time a button is pressed, and it's all done!
This way, a button has activated a value for either radius or color changes each time.
By holding down the menu button for more than 1.5 seconds, a quick "PAUSED" text is shown on the screen, the game returns to its normal state after two seconds.
You can create your game main menus or pause menus this way or have them stay on until some other button has been pressed again.
Once the color has been chosen, we can enter the draw_circle function. This function will draw a new circle on the screen with a specific location (x and y coordinates), radius, and color.
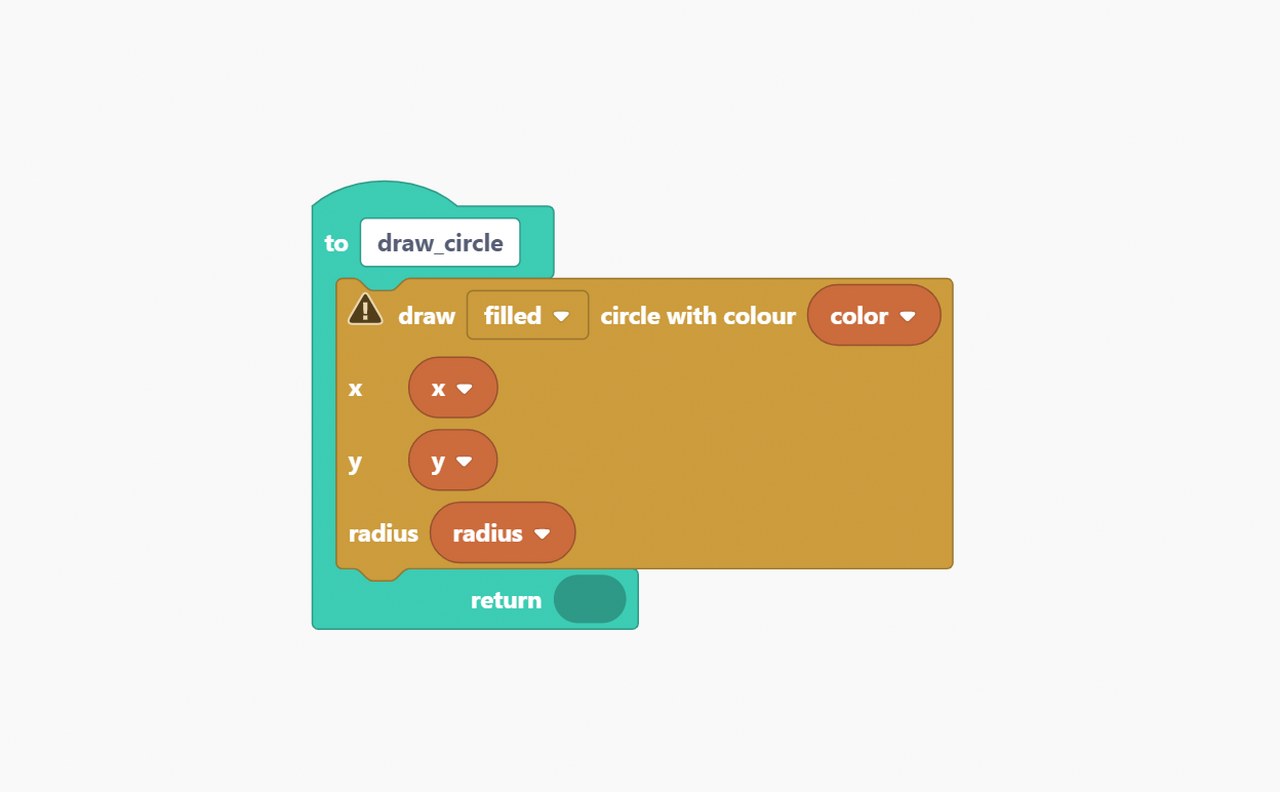
Clearing the screen at the beginning of the each loop will ensure that the previous drawing of the circle does not stay on the screen.
You can try removing the 'clear screen with colour black' from the beginning of the draw_circle function to see what will happen if we don't do that!
Printing additional data
If we ever want to print additional stuff on the screen, like points count or number of lives left, it's best to do it at the end of the loop function, when everything else is already drawn, so that you always have a clear view on the data.
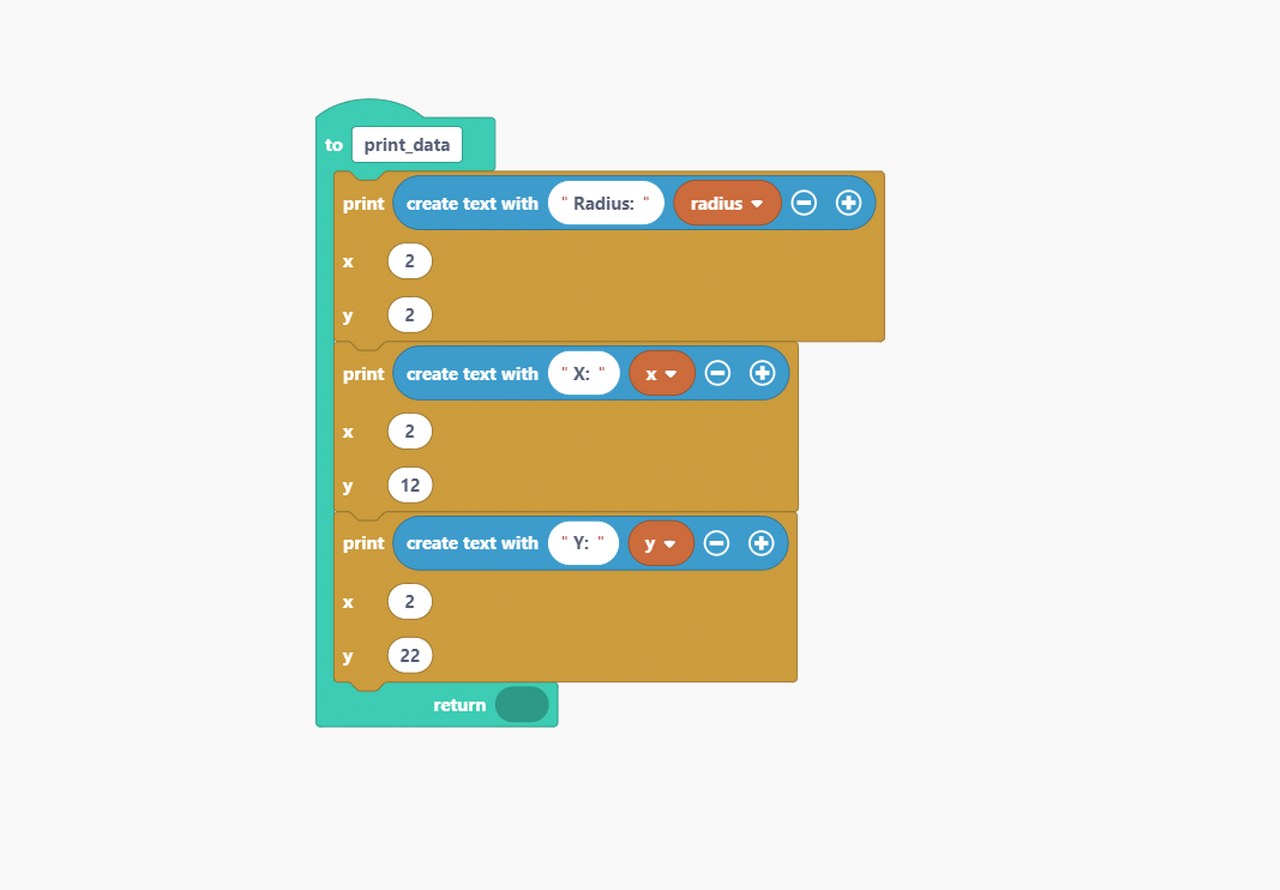
In this function, we're printing the values of radius and x and y coordinates in a specific place on the screen so we can see it at all times.
Notice that you can leave return values of functions empty if you don't intend to use them.
Complete game
This is it!
Every part of the game has been explained and shown in detail and now here it is all in one place.
Every part of the game has been explained and shown in detail and now here it is all in one place.
There are many different ways you can create and code your own game and in the next chapters there will be links to Nibble games that are already on the console, so you can check them out as well.
The best way to learn something new is to study other creations and take an idea out of every single source.
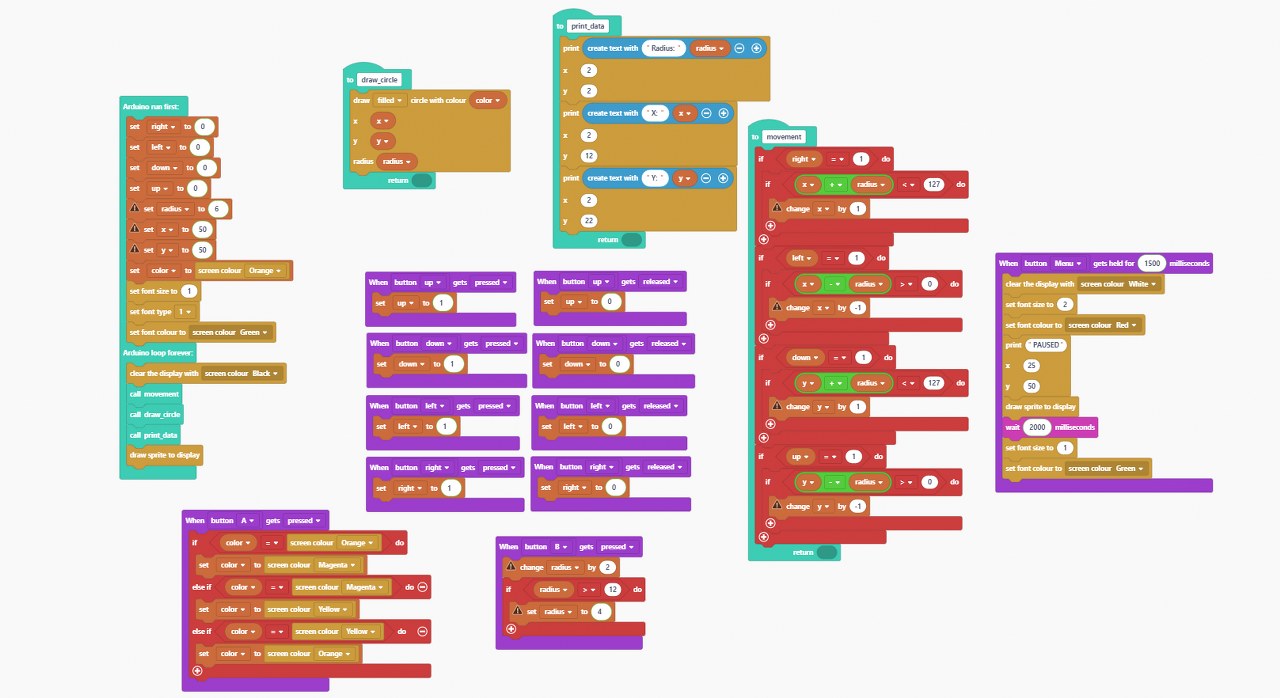
The way that the blocks are placed on the board isn't important, everything will work the same.