

Additional steps for old versions
Additional steps for old versions
This is only for old MAKERbuino sets!
You’ve got a kit with the old version of the LCD screen board, eh? Not to worry, it has the same specifications and capabilities and the connector on it is just a bit different.
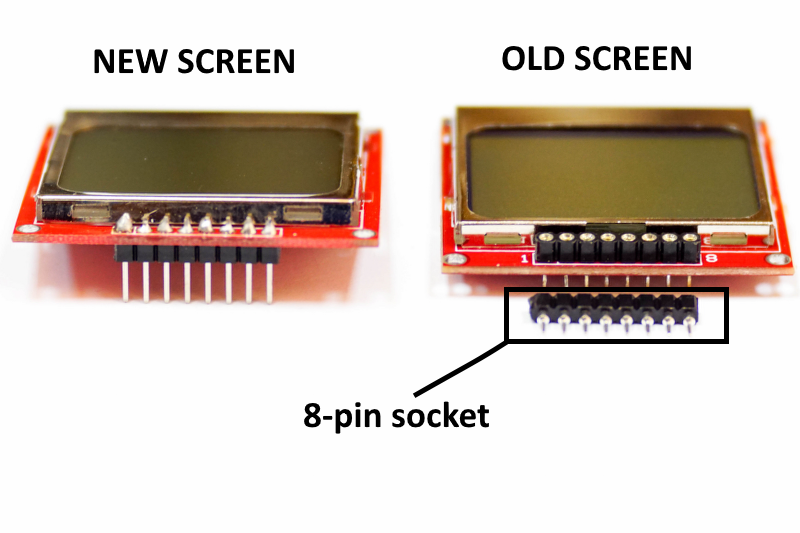
Along with this type of screen, you should’ve received an 8 pin header socket like showed on the photo next to this paragraph.
You will have to solder the tiny female connector first and then plug the Nokia screen into the connector.
Pro tip: first solder one lead of the bottom connector then check if the connector is aligned properly and correct the alignment if needed. When the connector fits nicely on the board, solder the rest of its leads.
Attach your screen to the socket you’ve soldered to the PCB.
Fasten the screen with M2 nuts, bolts, and spacers.